
Accessing and editing PDFs directly from SharePoint can save you a lot of time and frustration.
With Drawboard PDF’s SharePoint integration, you can access your SharePoint library, annotate your files, and sync changes back to SharePoint automatically. That way, you’ll never have to worry about losing progress or version confusion again.
Here’s how to edit PDFs in SharePoint with Drawboard PDF.
Your dashboard is the homepage of the Drawboard PDF app. Here, you can see, organize, sort, and edit your files quickly.
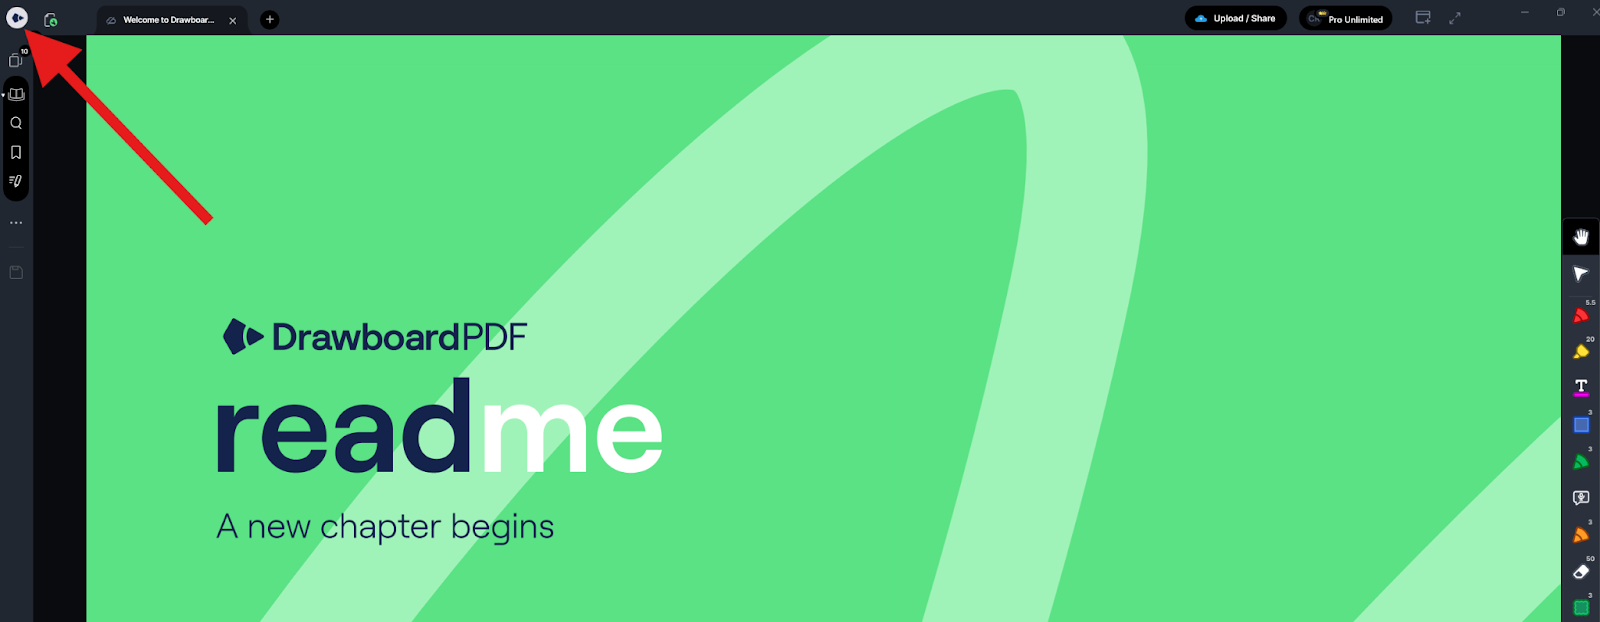
If you just opened the app for the first time, or don’t have any files open, you’ll start at the homepage. If you’ve been working on a file, click the Drawboard icon in the top-left corner to return to the dashboard.
Drawboard PDF makes it easy to create or open files from the dashboard, whether it’s from local sources or your cloud storage.
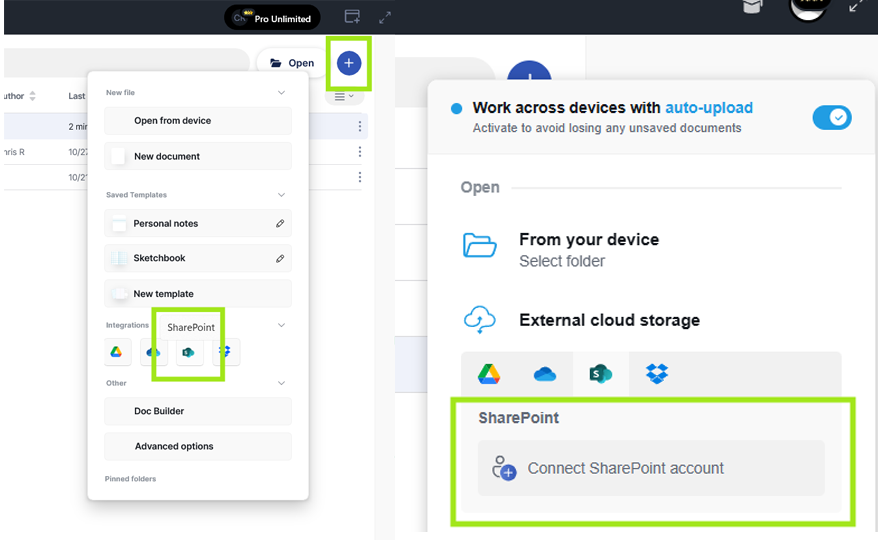
In the top-right corner of the screen, click the ‘+’ icon to see all the sources you can add a file from.
Under ‘External cloud storage’ (or ‘Integrations’ on the Windows app) select “SharePoint” and then “Connect SharePoint account” to start the authorization process.
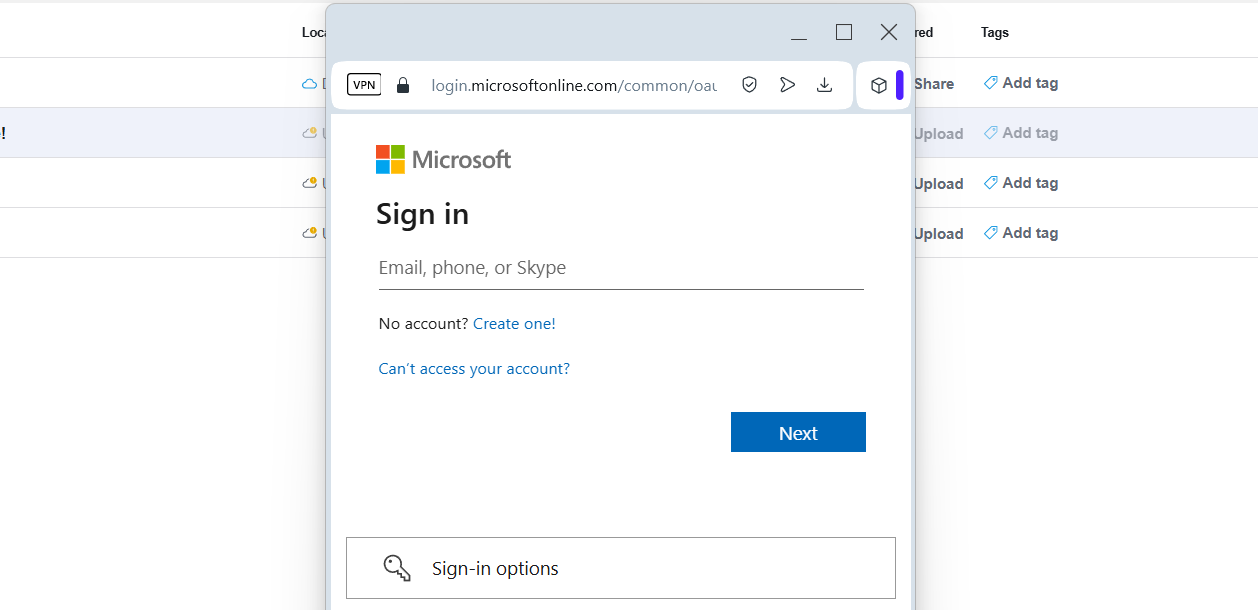
When you click the SharePoint integration button from the app, it will take you to your web browser, or open a pop-up window to Microsoft’s login page.
Complete login normally, approving any permission requests, until you’re returned to the app or the SharePoint file explorer opens.
Once you’ve connected your SharePoint library to Drawboard PDF, you can access your files directly from the app and bring them into Drawboard PDF.
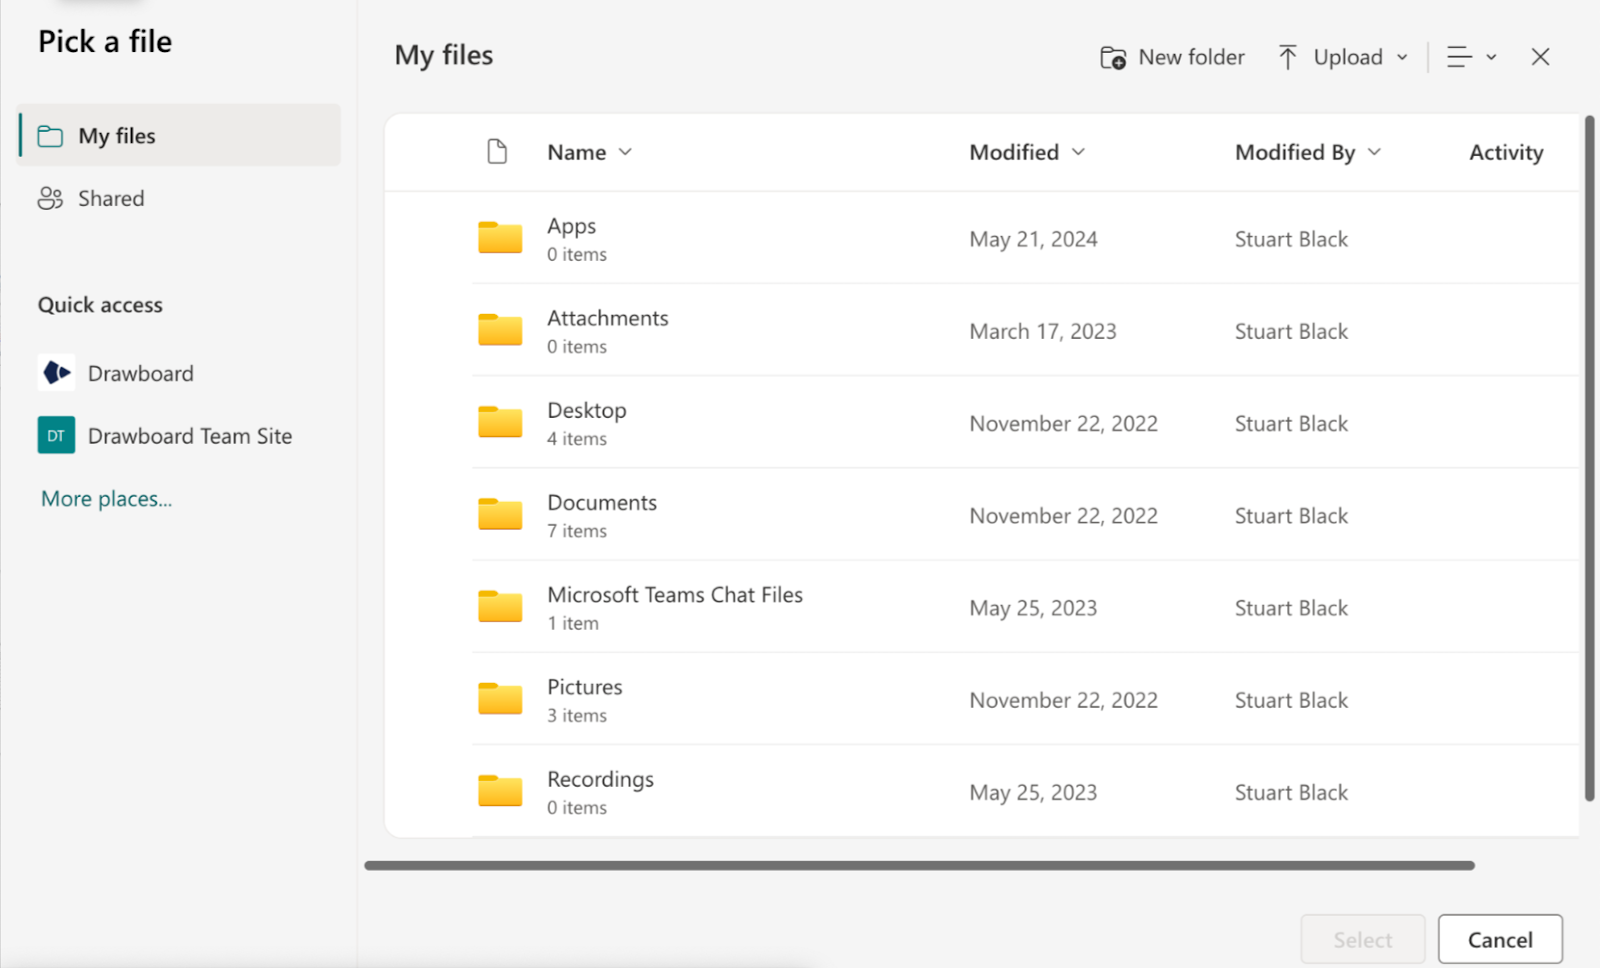
To start adding files, go back to the ‘+’ icon on the Drawboard PDF app dashboard, then under “SharePoint,” select your email address. This will open the SharePoint library’s interface.
Navigate your SharePoint library and mark any files you want to annotate in Drawboard PDF. Then, press “Select” to add them to your SharePoint tab in the Dashboard.
From the “All” or “SharePoint” tabs on your dashboard, click or tap the file(s) you want to edit to open them.
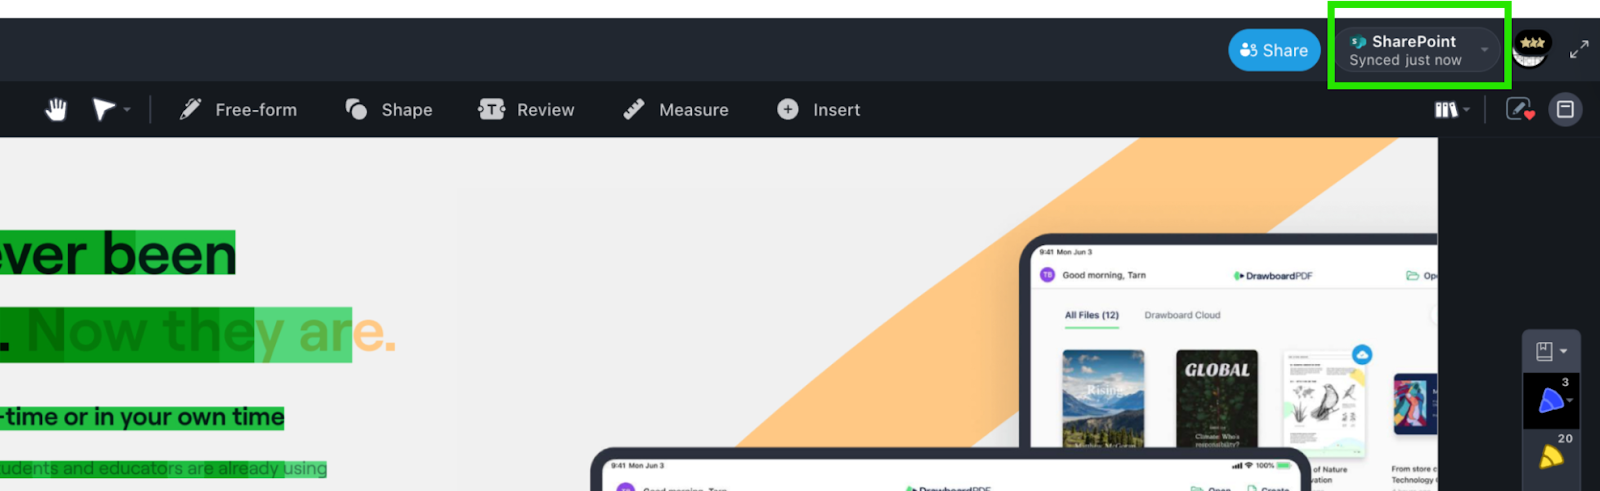
Once they’re in the app, check the top-right corner of the editor to make sure you have syncing on. Here, you can change the sync frequency, manually sync it, or turn syncing off.
If you’re ready to make your SharePoint PDF workflows more efficient, start your 14-day free trial of Drawboard PDF today.
Are you a student or teacher? Check out our 3-year Student Degree Promotion for a big discount on a 3-year plan.
Accessing and editing PDFs directly from SharePoint can save you a lot of time and frustration.
With Drawboard PDF’s SharePoint integration, you can access your SharePoint library, annotate your files, and sync changes back to SharePoint automatically. That way, you’ll never have to worry about losing progress or version confusion again.
Here’s how to edit PDFs in SharePoint with Drawboard PDF.
Your dashboard is the homepage of the Drawboard PDF app. Here, you can see, organize, sort, and edit your files quickly.
If you just opened the app for the first time, or don’t have any files open, you’ll start at the homepage. If you’ve been working on a file, click the Drawboard icon in the top-left corner to return to the dashboard.
Drawboard PDF makes it easy to create or open files from the dashboard, whether it’s from local sources or your cloud storage.
In the top-right corner of the screen, click the ‘+’ icon to see all the sources you can add a file from.
Under ‘External cloud storage’ (or ‘Integrations’ on the Windows app) select “SharePoint” and then “Connect SharePoint account” to start the authorization process.
When you click the SharePoint integration button from the app, it will take you to your web browser, or open a pop-up window to Microsoft’s login page.
Complete login normally, approving any permission requests, until you’re returned to the app or the SharePoint file explorer opens.
Once you’ve connected your SharePoint library to Drawboard PDF, you can access your files directly from the app and bring them into Drawboard PDF.
To start adding files, go back to the ‘+’ icon on the Drawboard PDF app dashboard, then under “SharePoint,” select your email address. This will open the SharePoint library’s interface.
Navigate your SharePoint library and mark any files you want to annotate in Drawboard PDF. Then, press “Select” to add them to your SharePoint tab in the Dashboard.
From the “All” or “SharePoint” tabs on your dashboard, click or tap the file(s) you want to edit to open them.
Once they’re in the app, check the top-right corner of the editor to make sure you have syncing on. Here, you can change the sync frequency, manually sync it, or turn syncing off.
If you’re ready to make your SharePoint PDF workflows more efficient, start your 14-day free trial of Drawboard PDF today.
Are you a student or teacher? Check out our 3-year Student Degree Promotion for a big discount on a 3-year plan.


We are a PDF and collaboration company. We believe that creating more effective connections between people reduces waste.
Our best work has been overtaken by busywork. That’s why we’ve created ways to help people get back to working wonders without any paper in sight.
Drawboard PDF lets you mark up and share with ease, and Drawboard Projects brings collaborative design review to architecture and engineering teams.
At Drawboard, we work our magic so our customers can get back to working theirs.

